|
Ewan J. Innes, MA(Hons Scot. Hist.) FSA Scot
© 1989
Synopsis: This essay describes the strategy and tactics used by the commanders of the Scottish armies during the period 1296 to 1314.
Please see my copyright policy if you wish to cite any part of this essay.
| Maps
| 1
| 2
| 3
| 4
| 5
| Bibliography
| Printer Friendly |
The Scots had had little military practice during the reign of Alexander III, the only
action being between King Hakon of Norway and Alexander at Largs in 1263.3 Consequently,
they were ill-prepared to cope with an English invasion.
Before Edward had reached Scotland in 1296, a Scottish army crossed into England and,
with a ferocity which almost rivalled Edward, ravaged Redesdale and Tynedale and burned
the towns of Corbridge and Carlisle and the monasteries of Lanercost and Hexham. The
reasons for this seem to be unclear, but it could have been a preemptive strike; it was
certainly a policy to be repeatedly used by both Wallace and Bruce.
Edward was in no hurry to complete the conquest when he was so sure of success.
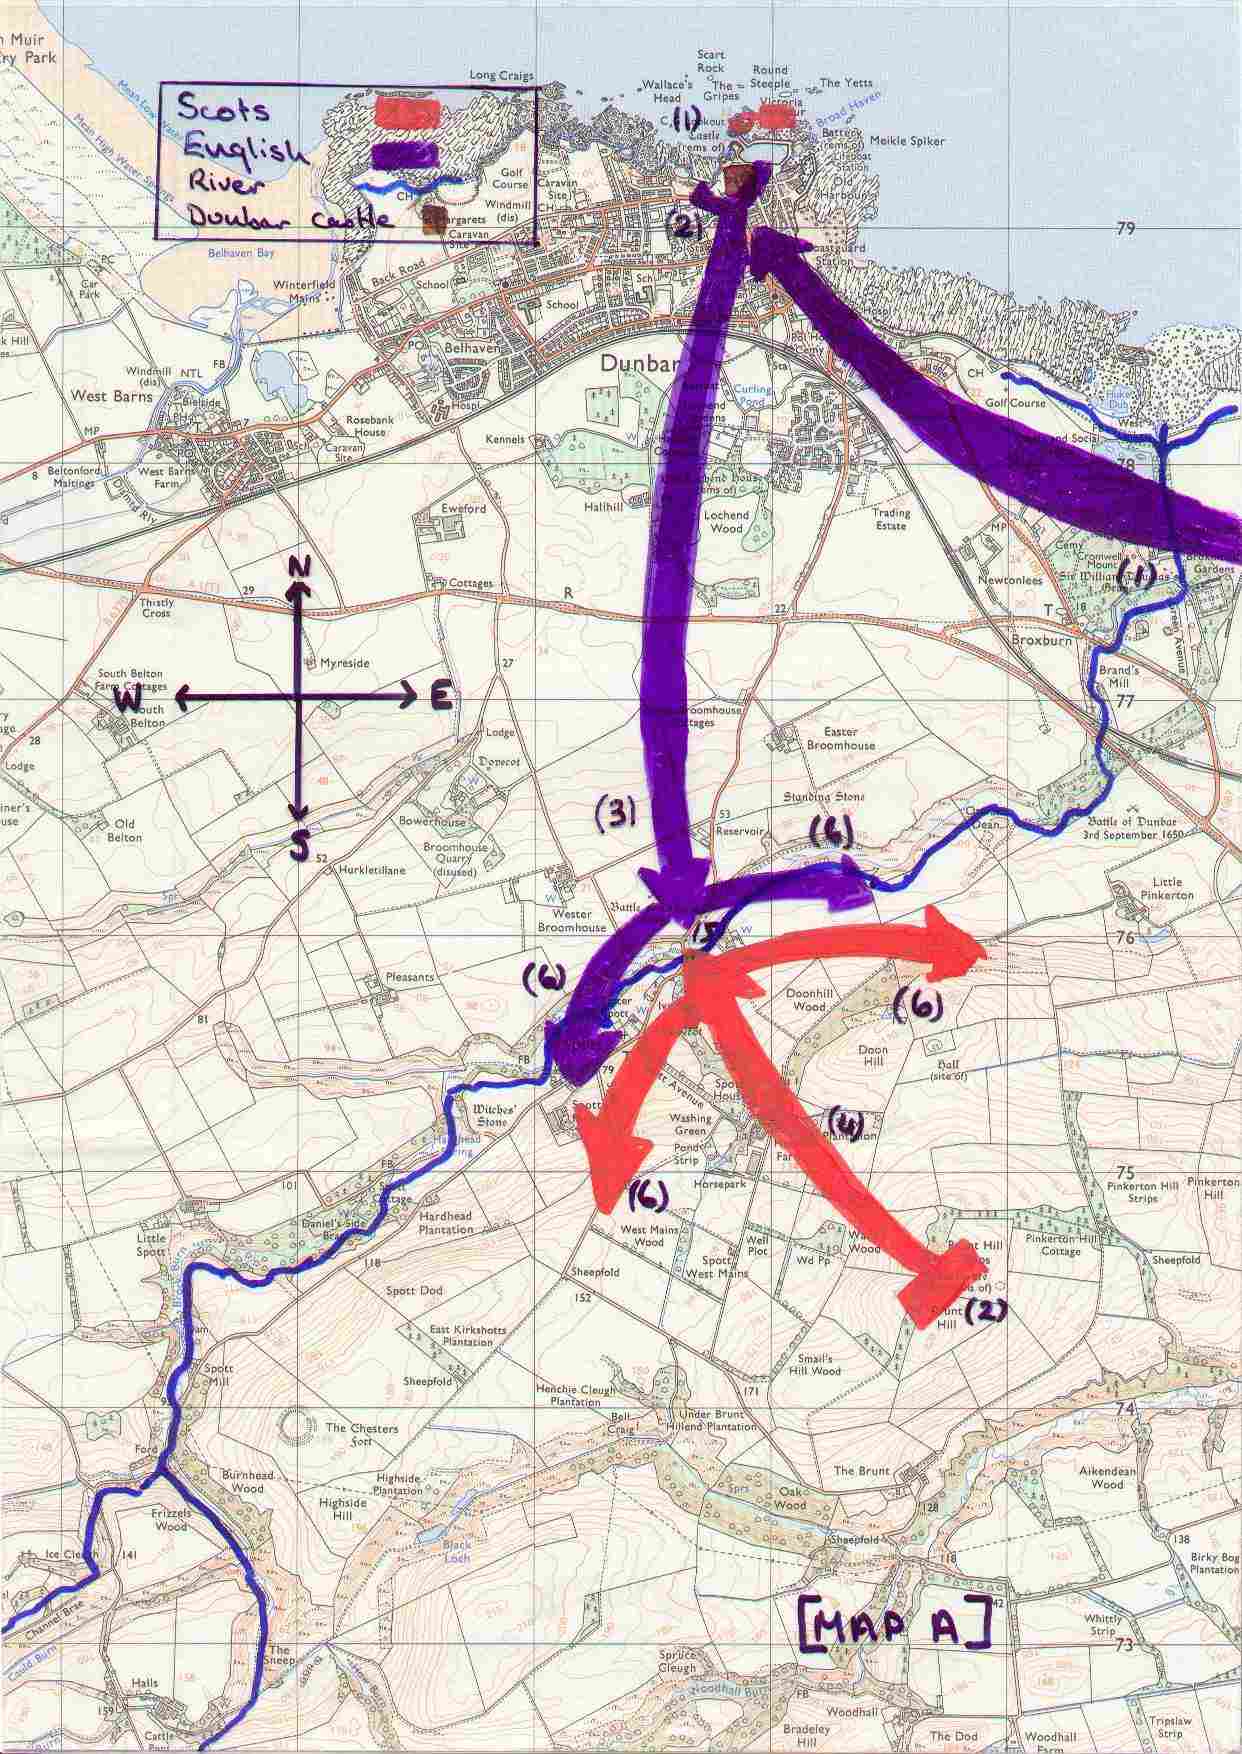
Eventually he sent a cavalry force under John, Earl Warenne to take Dunbar. Warenne, who
had begun the siege of Dunbar[Map A (1)] was attacked by
the "feudal host of Scotland".4[Map A (2)]
Warenne turned westward with his continental veterans to meet the Scots as they marched
over Spottsmuir. Before the English could reach the Scots, they had to descend into a
hollow [Map A (3)] through which flowed the Spott Burn.
The Scots observing this action believed the English to be fleeing and charged. [Map A (4)] The English however were not fleeing and formed
up in good order, throwing back the charge and setting about the broken ranks.[Map A (5)] A massacre then ensued and there were heavy
casualties among the Scottish foot.5[Map A (6)] Dunbar is
especially notable not only for the spectacular failure of the Scottish feudal host- the
official military might of the Crown- but also for the large numbers of distinguished
prisoners taken.
The example of Dunbar was not lost on the Scottish leadership. The ineptitude of the
Scottish tactics contrasted unfavourably with the skill of Warenne in controlling and
marshalling his forces, and the lack of discipline and experience of the Scottish army was
exposed. Pitched battles would have to be carefully considered before being embarked upon
in the future.
| Maps
| 1
| 2
| 3
| 4
| 5
| Bibliography
| Printer Friendly |
|
